A learning stub server in 40 lines of code
This article demonstrates a simple stub server, written in Javascript, which captures responses as it proxies them to backend services, and can then act as a stub server, serving up those responses as appropriate.
I was trying to solve a problem recently, where I needed an external webservice as part of a journey in performance testing, but no performance test version of the external webservice was available. What I wanted was a stub server that I could use in place of the external webservice, but that would require me writing all the request / response pairs I would need.
What I thought would help, would be a stub server which could be connected to the external service and would store the request and response the first time there was a call, but would then serve up the stored version for future requests. This would mean I wasn’t passing performance test loads to the external service, but at the same time I didn’t need to write all the stubs myself.
I’d been wanting to look at Node.js for some time and this seemed a good opportunity. The Node.js website has a 5 line web server on its home page, so seems well-suited.
Here is the 5 line web server for reference:
var http = require('http');
http.createServer(function (req, res) {
    res.writeHead(200, {'Content-Type': 'text/plain'});
    res.end('Hello World\n');
}).listen(1337, '127.0.0.1');
As you can tell from the name, Node.js is Javascript-based but it is server side rather than client side. It is also slightly different from many other languages (such as Java) in that Node.js is its own server and is not embedded in any sort of container (like Tomcat or httpd).
To run the above example, you just issue the command:
$ node example.js
This is not a particularly robust way to run a server, so you can use the “forever” utility, which gives more control over Node.js servers:
$ forever start example.js
That gives you a very quick feel for Node.js
A Simple Proxy
Before getting on to the learning stub server, we can take a first step with a simple proxy. This is not a general proxy – I will be hardcoding in the remote URL – but it takes us some way towards our stub server.
Here is the code:
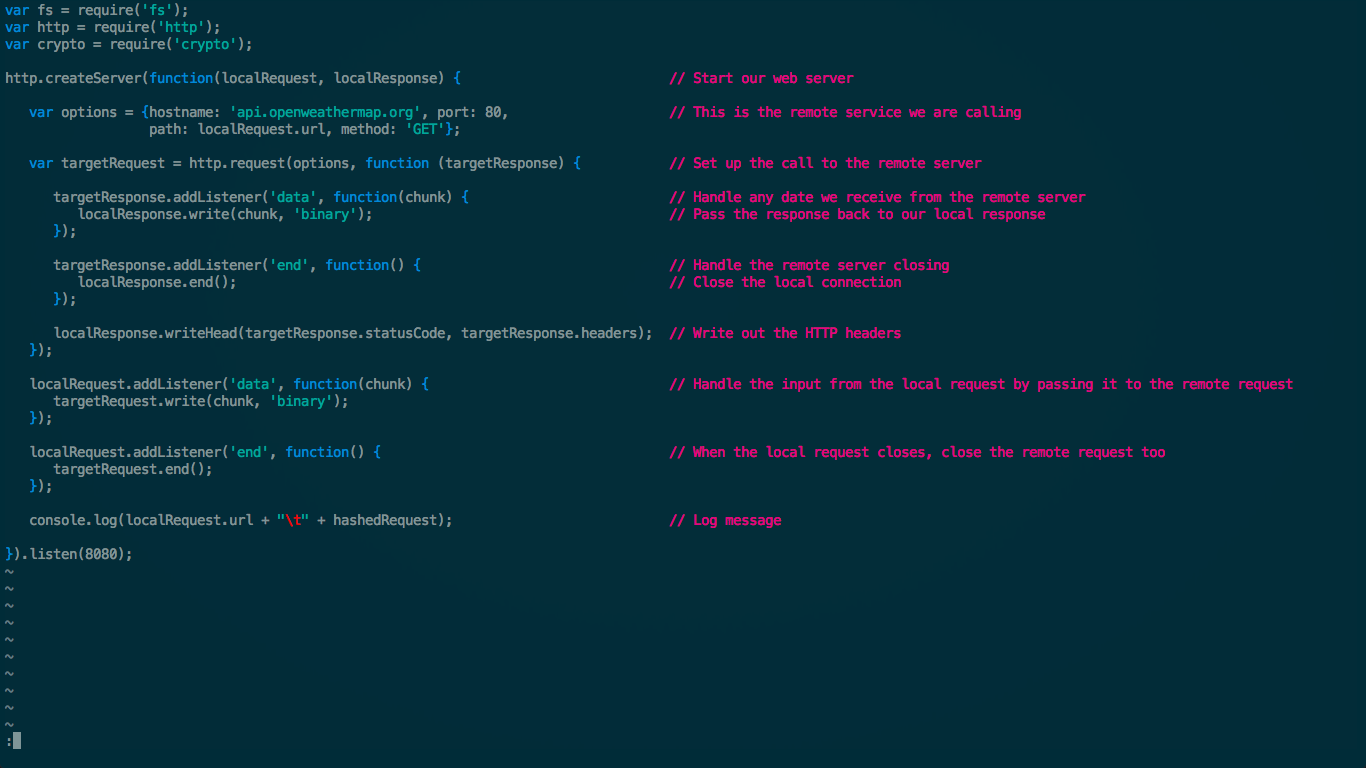
We begin by including some libraries we will need, then create the server.
This code is heavily asynchronous, using closures as handlers when functions
repeat. The first instance of this behaviour is the createServer command,
which takes a closure (similar to an anonymous function) as its parameter.
This anonymous function is called every time a new request comes in and has two
parameters – the request and the response we will be returning.
The options structure that comes next is our hard-coded remote server, which
we then use in creating our http request (assigned to the variable
targetRequest). We then define listeners for the associated response from
that remote server, which just pass the remote response on to the local
response (and close the local response when the remote response is closed).
That gives us the proxying of the response from the remote server to the local server. What we still need is the proxying of the request from the local server to the remote one. This is achieved with the last two functions.
Finally, we write out a message to the console (which will eventually end up in our log files).
So, the above code gives us a working web proxy in around 30 lines of code. What this will let us do is hit a local server and then return the matching response from the openweathermap API.
Take a look at that code again, make sure you are happy with it (the asynchronous flow can take some unravelling at first glance) and then we can move on to the stub server implementation.
The Learning Stub Server
To get to our stub server, we need to make some modifications to the above proxy server. What we will do is hash the request (using md5) to give us a unique (or unique-ish) reference to the request. We will then check our cache for a file with that md5 hash as its name. If we find such a file, we will just return the contents of that file (i.e. acting as a stub server). If we do not find that file, we will go to the remote server and get its response. We will then write that response to the appropriately named file in our cache and also return those contents as our response.
We modify the start of the above code as follows:
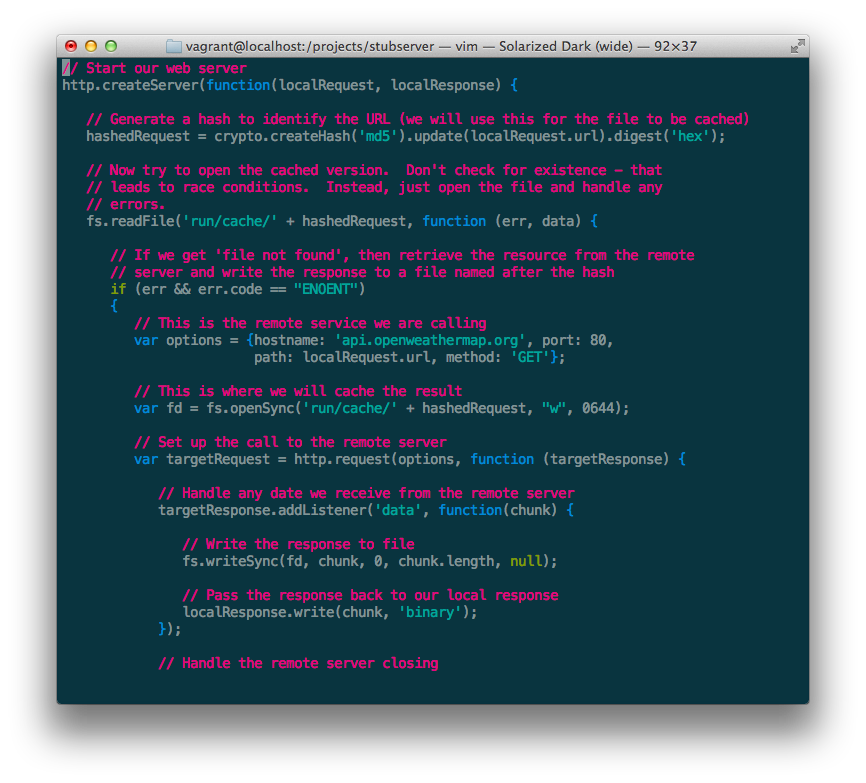
The above demonstrates how the hash is calculated, how we try to read the cached version and how we store the response when we don’t have a cached version. Hopefully the comments are sufficient to follow that part.
The next part of the code is as follows:
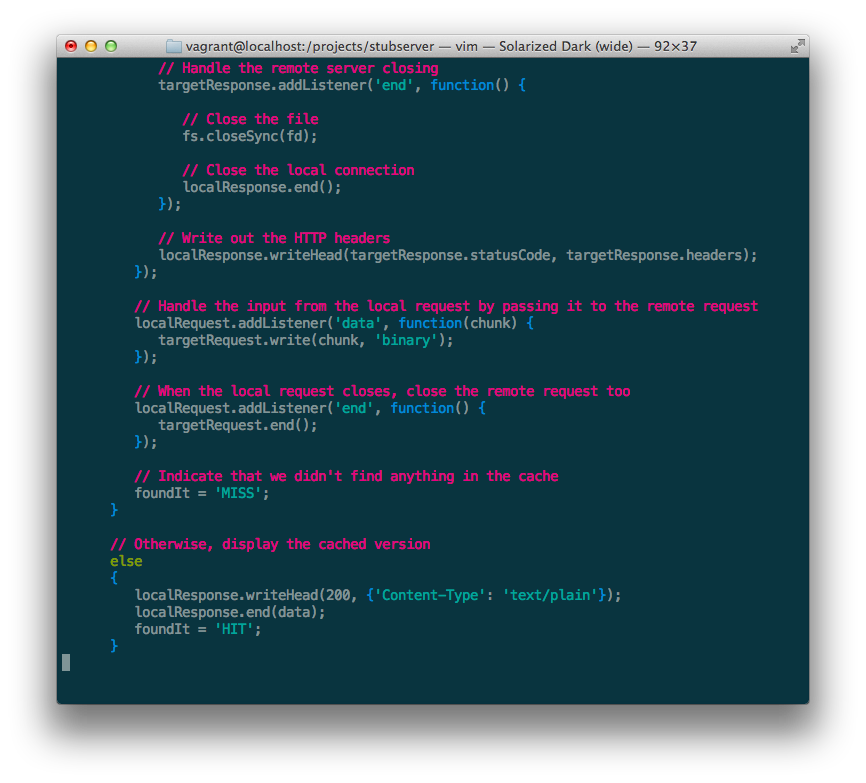
The above fragment finishes off the caching part of the code. Then there is the code for proxying the request to the remote server (which is the same as the previous example). That is followed by the code which is executed if the cache file is found (which just writes out the file content).
For completeness, here are the last few lines of code:
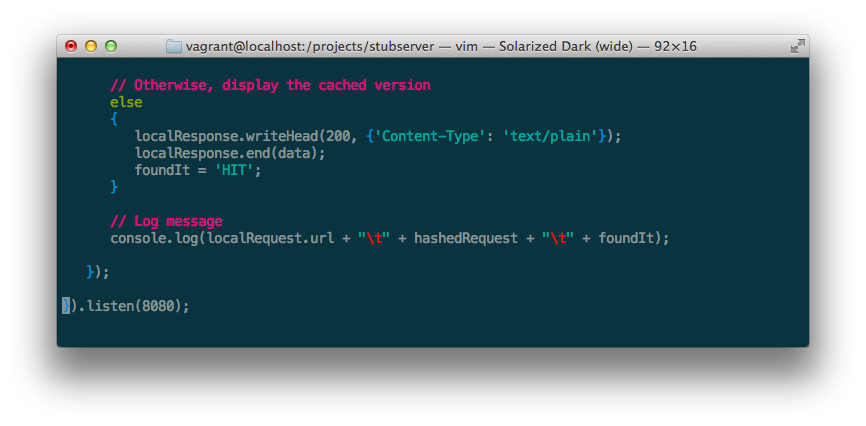
Which just includes the log entry (indicating the request URL, the hash and whether we matched a previously cached version).
The Stub Server in Action
Let’s run a series of requests through our stub server:
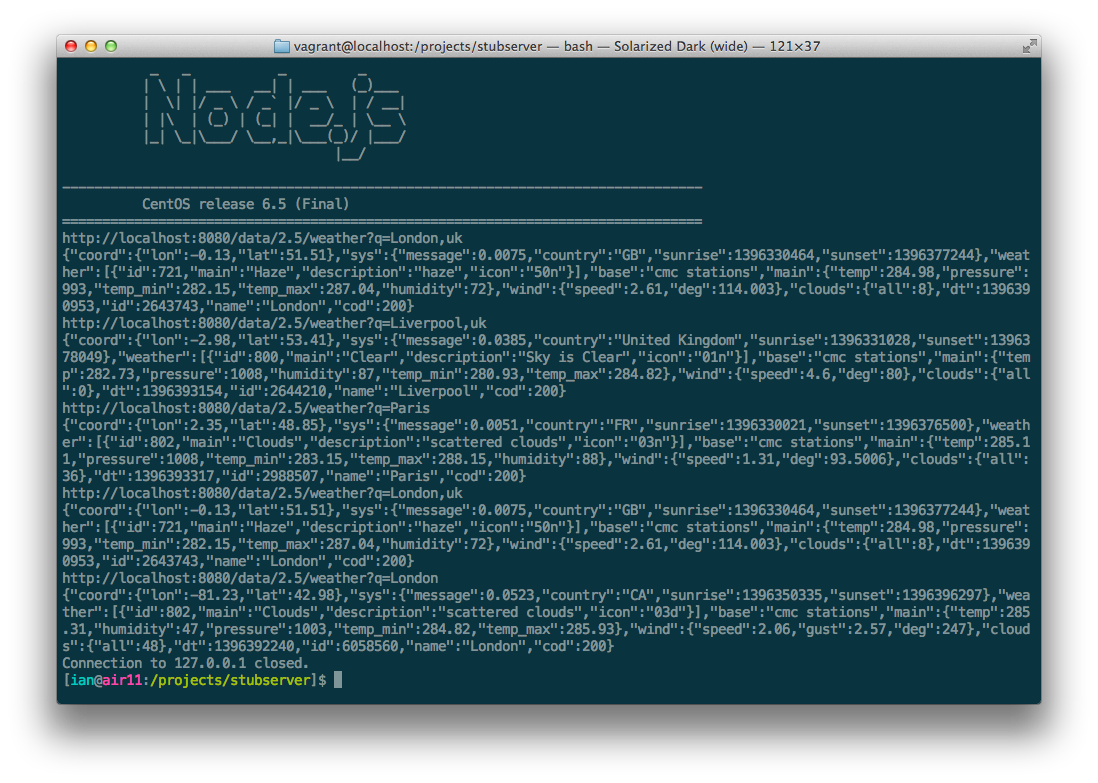
As you can see, we send 5 requests to the stub server, one of which is repeated (“London,uk”). Each request returns some JSON as a response. This demonstrates that our code is working as a proxy, but is it working as a caching stub server?
Let’s look at the log file:
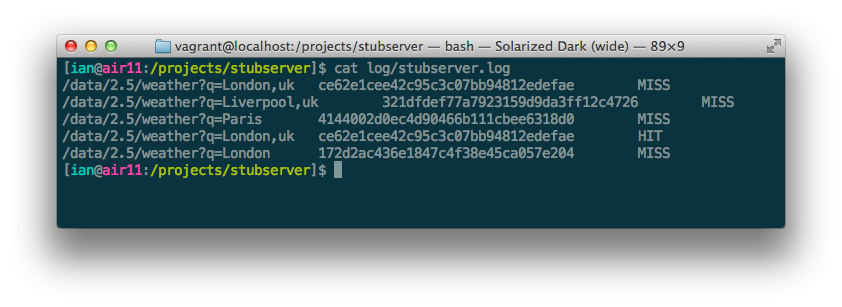
As you can see from this, our fourth request gives us a HIT in the log file.
This means it was found in our cache and served from there. This is for the
London,uk request — as expected.
If we run the same requests again and then take another look at the log, we get the following:
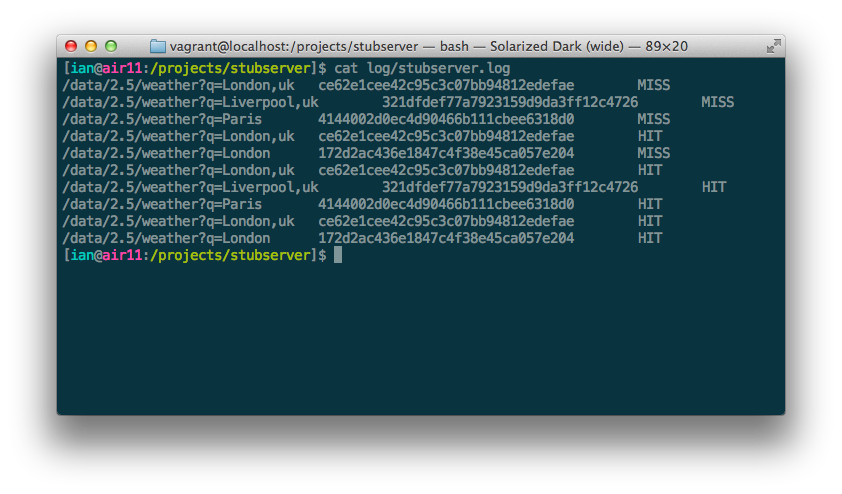
This time all the responses come from cache (i.e. they all show a HIT).
The above indicates that our learning stub server is working as expected.
Summary
First impressions are that Node.js is powerful for this sort of application, allowing me to put together a useful tool in a few lines of code and in a fairly short time.
I have not had a chance to try this out in a real life situation, but it feels like a promising approach for further evaluation.